")

COVAP’s Alta Expresión Dry-Cured Acorn-Fed 100% Íbérico Pork Ham, or jamón, comes from the cooperatively owned ranchlands in the Valley of Los Pedroches, where the pigs roam free in the southern Spanish dehesa meadow, and happily feed on grass and acorns. These acorns are what give the ham its oleic acid component, the same ingredient found in olive oil. And the grass provides vitamins, minerals, and natural antioxidants to the pig. There is no question why this delectable product is a healthy and essential part of the Mediterranean diet and why it is praised around the world.
To truly appreciate this gastronomic treasure, it’s important to understand the art of hand-cutting a cured ham. This step-by-step process for cutting a Jamón Ibérico will help you feel confident when it comes time to carve, so you can truly savor every bite at home.
The Parts of a Cured Ham
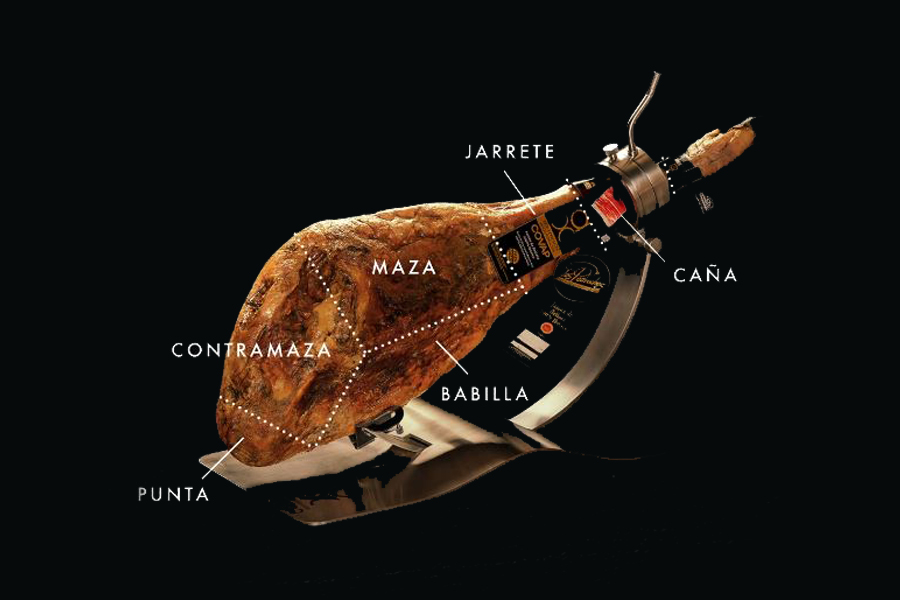
Every ham has 6 main areas, each with different aromas and nuances:
- Maza or the shank, is the top area where you will first carve.
- Contramaza or the flank, is on the other side of the hip bone below the maza.
- Babilla or the stifle, is narrow and more cured than the shank and it is the leanest part with less marbled fat.
- Punta or the tip, is full of flavor and has a higher fat content.
- Jarrete or the hock, is near the hoof and is the most fibrous part (this is where you will make the first incision before slicing).
- Caña or the thin shin bone, is a good reference point for identifying a quality ham that has exercised and thus has excellent marbling.
Cutting Tools
There are a few tools you will need to carve your ham:
- Jamón knife: a long flexible knife that allows you to easily carve thin slices.
- Broad-bladed butcher’s knife: a strong knife with a sharp tip which you will use to cut the outer layer and the fat.
- Paring knife: a smaller knife with a rounded oval handle and a sharp tip to make precise cuts in more angular areas and to separate the ham from the bone.
- Knife sharpener and honing steel: these two tools help keep the blades in perfect condition.
- Tongs or tweezers: use them to delicately remove slices after each cut and place them on the plate.
Securing & Preparing the Ham
Place the ham in the ham holder with the hoof area facing upwards. Ensure the ham is secure in the ham holder by screwing down on the bone. Now you are ready to begin preparing the ham.
First, you want to use your broad-bladed butcher’s knife to remove the outer layers of skin and yellow fat. To do so, begin by making a deep cut with the tip of the knife under the heel bone and running it halfway up the shin bone. You want to make a straight line from this point to the flank cut along the fatty part. We recommend making a single, long, and continuous cut on the ham so it looks neat and uniform.
If the ham is going to be eaten slowly, only remove the part you want to slice that day. That way, the rest of the ham will not dry out and will stay well-preserved. If you are expecting to eat the entire ham in one day, remove all the skin and fat to prepare the piece to be fully sliced.
Continue by marking and cleaning the hip bone, but only on the side you are going to slice. Carve carefully and eliminate the outer layers until the meat and the highly-praised white fat is exposed. As you consume the ham, continue cutting along a straight line.
Note: The white fat under the yellowed fat and skin should not be removed. This is the healthy fat from COVAP’s Alta Expresión Dry-Cured Acorn-Fed 100% Ibérico Pork Ham and it has as much, if not more, flavor than the meat itself. This fat is what gives the ham a particular creaminess, and it also has high antioxidant and oleic acid content (highly beneficial for cardiovascular health).
Cutting the Shank & the Flank: The Maza & Contramaza
After removing the outer layer of white fat, you will see how the lean meat— with its beautifully marbled fat— begins to appear on the shank. This will indicate that it is now time to start cutting slices. To do so, take the jamón knife and cut in a gentle back and forth motion. Think of it as a dance between the knife and the ham. Slices should be short cuts and be small and very thin, around 2 or 2.5 inches long. It is also important that each slice has an even amount of healthy fat and lean meat so you can fully experience all of the ham’s nuances.
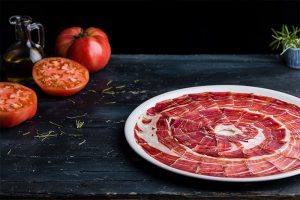
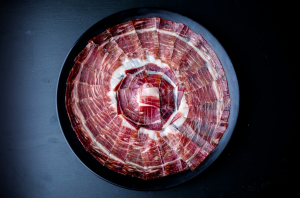
As you cut, use your free hand to remove the slices and place them on a plate. When plating the ham, pay particular attention to the way you lay out the slices. Make sure the marbling always follows the same direction to create an extra-special presentation.
When you reach the hip bone, use the paring knife to separate the meat from the bone. This will make it easier to remove the slices from this area. The cut should not be very deep here— you want to maintain the structure and firmness of the ham at all times. As the bone appears, once again separate the meat from that area.
Keep cutting along the same surface and along the new part that appears (the contramaza, or flank). Slice around this area by rotating the knife around the bone, and rotating your body around the piece to get a better angle and to cut the tip. Continue slicing and try to keep the cut straight and level with the shank. To get the most out of the ham, keep cutting until the femur bone is exposed.
Preserving the Ham
Once you have sliced the part you are planning to eat that day, use the initial layers of outer fat to preserve the ham. Place the slices of glistening white fat over the surface. This fat nourishes the ham and protects it from air so it will not dry out.
Cutting the Stifle and Tip: The Babilla & Punta
After you have finished cutting the shank, turn the ham around on the ham holder and position it so the hoof is facing downwards. Begin to cut the stifle (or the babilla), which runs from the knee to the tip. This is the narrowest area of the ham and has the least amount of fat, which is why it is also the most cured. Cut slices along the surface of the stifle and into the tip (or the punta), which is located behind the hip bone. Keep going until you have an area around 1.5 inches wide before making what is called the 3rd cut.
The 3rd Cut
Turn the ham on its side. Instead of continuing to cut in the same direction, change the direction of the cut to vertical while maintaining the same width. Start at the tip, making a lateral cut and extracting thin slices. These slices are known especially for their intense aroma and flavor. Once the bone prohibits you from cutting any further, continue carving above it until you reach the top part next to the hock (jarrete).
Cutting the Hock: The Jarrete
Rotate the ham again so the hoof area is facing upwards, and begin slicing the hock, which is a particularly flavorful area. Use the paring knife to make a deep cut and remove the fibula with a lever-like motion. Remove these slices to finish up slicing the main parts of the ham.
Cutting Ham Cubes
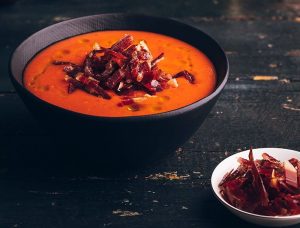
Once you have cut the main parts of the ham, you can really get the most out of this prized piece by removing the remaining ham in cubes. In the 3rd cut, you will see that the inner part of the opposite side of the slices is very lean and is ideal for slicing into cubes. These cubes are perfect for snacks, or as the shining star in a number of highly-praised Spanish recipes. The remaining fat pieces can also be used in cooking. The high oleic fat content is ideal for adding healthy flavor to a whole host of dishes. In addition, the ham bone is perfect for making flavorful stocks.
How to Serve the Ham
As you slice, we recommend placing the ham slices slightly overlapping each other on the plate to show off their marbling and color. If you are going to consume the ham immediately, the ideal temperature for cutting is room temperature, around 72ºF. It should never be much colder than that. Once you slice up the entire ham, there’s no doubt you will be able to feed a crowd. A 17-18 pound Alta Expresión Ibérico Pork Ham from COVAP can yield an average of about 40, 3 oz. servings.
Note: You may notice that small white spots appear on the slices. These are tyrosine crystals, which are the precipitation of amino acids generated during the meat curing process. They become visible as a result of the natural drying process in the drying houses and ultimately do not affect the flavor of the ham.
Hoping to carve like a ham master? Watch this video for a step-by-step visual of carving the perfect Ibérico Pork Ham